Stamp it, cut it, bake it, make it,
paint it, stick it, sew and wear it. Snap it, sketch it, pin it, write it,
play it, ply it, stop: re-write it. Try it, test it, learn it, link it, plan it, think it, pen and ink it.
Share it, give it, show it, grow it,
keep it, wrap it, pack and send it.
I've had a few questions lately about my creative process, so I wanted to talk a little about that today. I've been asked whether I plan everything on a page or just go with the flow. I'll focus on layouts today.
Usually these days I start off with a sketch - Scrapbook Challenges and Punky Scraps DT duties provide me with most of them, but I also like to look at Creative Scrappers and others that come up along the way.
Punky Scraps Challenge 34 sketch
my take
Then I spend a good few days thinking about the theme of the layout - I'm finding I like to tell a story on a page, but not necessarily with words. My journalling is usually on the back of the page these days, or hidden in an envelope or pocket somewhere on the page. So I think about the story, and which embellishments I have that can help me tell that story. Gauche Alchemy kits are great for finding the right bits and pieces.
I'll usually re-draw the sketch myself, adding notes about layers, embellishments, techniques and so on.
Next - and I find this Absolutely Important - I select the Most Appropriate background paper (I'm making 12x12 and A4 layouts at the moment). This is the true beginning. I have often made the wrong selection. I rarely go back and redo a page if I've already finished it. But if I haven't yet begun, or have only just begun, I will go back and select the right paper.
From this, the colours and textures will start to flow. Keeping the sketch in mind, I think about the page layer by layer - do I want the rub-on under the paint? Should I mist and mask the base paper? Can I stamp over that series of paper strips? Can I stamp over that stamp already there?
And then I get started. I roughly follow the sketch, but don't get panicked if things start to go off course. It's an organic process, and a page may turn out looking very different to a sketch in the end. I make mistakes, and accept them. I commit.
I've made a few 'test' pages, practising techniques and so on, but I've never been happy with them. I seem to be happier experimenting as I go. And it's this experimenting that is helping me develop my skills and broaden my repertoire.
Take, for example, the punchinella that comes from Gauche Alchemy. There has to be more to it than just layering it underneath something, right? Play with it! Test it! Push it to its limits! There are LOADS of things you can do. See for yourself:
And a bonus this month:
the card I made with the punchinella resist technique
Experimenting is so important for the creative process. You can decide what you like doing, what you don't like doing, what you're better at, what you want to investigate more.
Two big reasons behind the handmade nature of our wedding were the desire to express ourselves precisely, and having a small budget. The table decorations we pulled together show both of these:
I spy nautical stars again
The flowers, as you know, were handmade from paper. The vase was a coffee tin covered with punchinella (look out very soon for a video tutorial on using punchinella); the candle holder was a jar that once held gherkins. I designed the labels on the jar and candle myself.
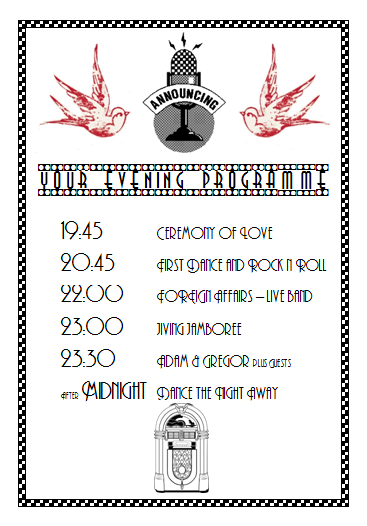
We kept it simple and understated - just us. No frilly froofiness, no swan-shaped napkins, no bows on backs of chairs. There were a couple of other things that formed the table centrepieces - a quiz, again completely designed by me to look like a old diner menu, and the evening programme:
I totally love that microphone image
Once again those beautiful swallows made an appearance. I am planning something else for these swallows, something that I hope will happen this year.... to be continued....
Wedding flowers, beautiful wedding flowers. Beautiful handmade wedding flowers. I've just made the bouquets for the bridesmaids, and I can't wait any longer (I can't wait at all, it seems) to share them with you.
I was so unsure for so long how I wanted the bouquets to turn out... I had one idea, then another, then went back to the first, then had a third, a fourth, and so on. Then we changed our minds about the bridesmaids' dresses, and that totally threw all bouquet plans up in the air.
But a late April visit to bluebell-carpeted woods convinced me that uniformity would be most visually impressive. And so I got to work. The result is a simple, understated and elegant little bouquet which should hold up pretty nicely against the bridesmaids' dresses.
Now just to solve the problem of my own bouquet...
After the mammoth delivery of quality custom handmade wedding decor from my mum, the pressure is off me somewhat as I realise there's not too much for me to do.
The legendary bunting
I have had some decorations knocking about for a while, and now seems as good a time as any to share them.
I had to have hearts on a string:
I also had to have a sprinkling of tiny spheres:
There's more to do, but I'm not so stressed about it all.
Although I can't claim I ever was a daddy's girl (nor much of a mummy's girl, for that matter), I can say with certainty that as I've grown up my relationship with my dad has also grown. I now see him as full of wisdom, happy to give advice if I ask for it, supportive and then some, relaxed enough to trust my judgement on things, uncomplaining, and accepting of those traits I have which set me apart from the rest, and from him.
I know this post is kind of coming a few days early, but it's because I want to share a little tutorial for the card I made for this month's Scrapbook Challenges card feature and Fathers' Day.
I made a card that combines the fashionable accordion flower with the more old-fashioned rosette.
So, grab your materials: cardstock, concentrically sized circles, and a strip of paper to score into the accordian flower. I embossed the lighter blue cardstock with a woodgrain folder to give the card more masculinity.
Ink all the edges of all your shapes, fold the cardstock into a card and stick the embossed part onto the cardbase. Then start to make the flower.
Score the strip of paper (30cm in length; the width should measure half the diameter you want the flower to be) at 1cm intervals and then fold alternately (mountain and valley folds for origamists). Stick together with double-sided tape (this is what you see in the picture above).
Push one edge of the flower in towards the centre. This is really where the magic happened for me - the first time I made one, it all suddenly just popped into place. Hold it down with one hand, and stick your largest circle on to hold it in place. I'd recommend using a hot glue gun for this.
Then stick on the medium circle and then the small circle. It's a good idea to punch an extra one to stick on the back so it's easy to stick the flower to the card.
Then cut two ribbon-shaped strips (or, yes, use ribbon!) and stick them onto the back before sticking the flower onto the card (again, with a glue gun).
Finish off by cannibalising some wrapping paper, or using specific scrapbooking fathers' day embellishments.
A quick reminder: remember this page I made recently? Well, it's up for lifting on the True XOXO Girls blog - get your entries in in the next two weeks to be in with a chance of winning some goodies!
Oh, and before I go... check me out for getting featured on Paper Issues!
With the exception of some DT posts that will appear from time to time, I’d like to officially declare June the Wedding Month here on my blog. Not because I’m jumping on the bandwagon: oh no. It’s because we’ve just returned from a long wedding weekend where we watched our friends get married, and as their wedding was one day shy of three months ahead of ours, we always felt invincible when it came to the organisational side of things.
Until now.
That date has passed, and we are now sharing a house with a pesky but necessary countdown timer. Every now and then this little fella jumps out at you from behind doors and makes you jump out of your skin. But we’re stuck with him for a while, a while that will speed by I’m sure (even if we suddenly need it not to).
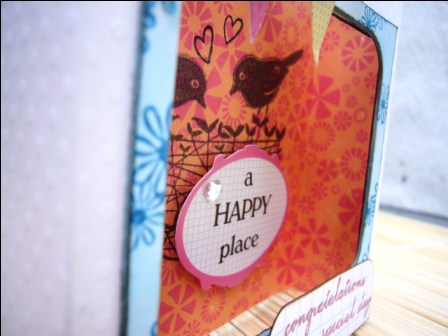
So I’m taking a deep breath, and diving into Wedding Month with the card I made for our friends. It’s a box card of sorts, in that it is box shaped and it comes in a box. I wanted to make a summery, not-too-feminine (there are, after all, both a bride and a groom involved), cute-but-not-sickly kind of card.
I repurposed the box from some old packaging I kept...
...I covered it with some paper from a leaflet picked up a couple of weeks ago that I matched to some MME and Echo Park papers...
...added some American Crafts ribbon for the pullout...
...and, ooh, stamped on a chipboard frame and then chalked over it.
The card can stand up on its own (kinda useful) and is lined on the inside so whichever angle you look at it from, it's pretty.
That's about the extent of my sharing my Wedding Month time with others. From here on in, it's almost exclusively going to be about our wedding. Self-indulgent? Perhaps. A chronicle of creations? Certainly. Interesting? I hope so.
I'm gambling on the bride in the picture not reading my blog, as this is her 30th birthday present and it's not her birthday for another week. I hope I haven't spoiled the surprise! Anyway, I made this page for a friend who got married a few years ago.
It's inspired by a Pencil Lines sketch from March (and the reason I'm posting it now is so that I can enter in time).
You can't see because the photo is black and white, but the blue I've chosen matches the bridesmaids' dresses (and that's me, on the far left of the photo). I also used a bit of orange - not my favourite colour, but I love how it goes with the blue.
I hope my friend likes this. And is surprised by it, in a good way of course.
Yesterday I was at market. While many of you I'm sure were having a nice, relaxing Sunday, maybe at home or maybe strolling around a craft fair yourselves, I was behind a stall. Operating (or trying to) in French. And today I'm exhausted :-)
I just wanted to show you a few things I made for sale.
...Some altered wooden hanging hearts...
...a clipboard (I confess, I copied the one my mum made for me below)
...some embellishments...
...some gift tags (actually these are leftovers from a batch I made ages ago)...
...and some tags that my mum made for me to sell...
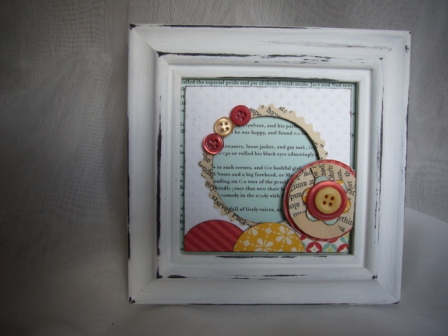
...as well as a couple of altered frames...
There were some other things I made too, but I'll share these another day - have to catch up on some sleep now!