My mum (so sweet of her) sent me these toadstools cut from the Cindy Loo Cricut cartridge the other day.
They are too good. So I made a 3D toadstool in their image.
Here's a little explanation of how.
1. Cut out your shape, making sure it's as symmetrical as possible. Using it as a template, trace a further 6 shapes (giving you 7 in total).
2. For the toadstool, trace around the stem onto a different colour paper and cut those out, too.
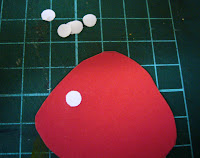
3. Add the spots.
4. Do the same for all 7 shapes.
5. Start to fold the shapes in half vertically. I used quite thick card, so to help fold neatly I scored the toadstools first.
6. Now you can start glueing them all together.
7. Once you've stuck them all together, fan out the sections and you'll have your 3D shape.
I also tried an autumn tree:
For the tree, I roughly mixed a little green and ochre paint and dabbed onto the paper, trying not to cover too much of the trunk (because I had traced the shape with all the trunks facing outwards, I knew just to stick to the middle section when painting).
When it was dry I cut out the shapes as before, and started to fold and stick as before.
This time I added a length of string during the sticking phase, so that the shape can be hung up somewhere. It's easier to to this at this stage, rather than trying to thread it through once the shape is complete.
And here's my tree:
I know that some of you want to make some more of these... when you do, tell me because I really want to see what people come up with!


Amazing ... you have so much creativity in you.
ReplyDeleteThey are so sweet, I would never have thought about doing that, I suppose you could just cut out a few on the cricut and then make them into a 3D shape, so cute x
ReplyDeleteCute! And it would be a great project for another childrens craft class too.
ReplyDeletei'll sure make some of these Sweety and I'll show you! x
ReplyDeletesuperb!!! thanks for sharing!!!
ReplyDeleteVery cute - I'm thinking stars for the tree :D
ReplyDeleteSo cute....I love the toadstools :)
ReplyDelete