Tuesday, 31 August 2010

A Tip and a Winner!

Thank you to those of you who participated in my giveaway last week. I am pleased to announce the winner, picked from a hat by my helpful fiance (who is NOT pictured below, by the way!). The winner is:


To claim your prize, email me your address and I'll put the item in the post for you!

Now, I'd like to share with you a technique I used for painting these hearts. Actually I was told about it by my mum, who was told by the lady in the shop, who was told by... word of mouth is still quite fast - not quite at YouTube or forum speed, but it does work!

If you remember, I said that the hearts had a kind of shabby look to them - not worn, not vintage, but a little aged. The technique I'm talking about is a way to achieve a certain distressed look. In a nutshell, you use a combination of PVA glue and acrylic paint. I've seen a few videos on YouTube, all of which feature slightly different methods of application: some start with PVA, some don't let the PVA dry before applying the paint, and some use a heat tool to dry the layers.

The technique I used was to paint a layer of acrylic onto the heart and let it dry. Then I painted a layer of PVA glue - quite thick - on top and let it dry. Finally I painted a second layer of acrylic on top of the dried PVA and let that dry. I was patient - I didn't try using the heat tool to speed up the drying process, but some people say if you do it increases the 'crackage'. I wanted to keep a very plain base so I used the same colour for both paint layers, but if you wanted to have a more striking effect you should use a darker first layer, which will then show through the cracks. You can also try rubbing ink into the cracks for a more striking effect.

A Note on Crackle Paint

I bought some a few months ago, after resisting the price for a very long time. The first time I opened it, it was way too thick and the first layer I painted crackled off completely. Not happy, I added water and mixed it up, and it seemed to be OK after that. The differences between using Crackle Paint and the PVA-acrylic technique are, of course, the cost, but also the variety you can achieve at a lower cost: you can mix a lot more colours, and colours combinations, with acrylic paints. One other big difference is the type of distress. Crackle paint really gives that classic crazy paving type of crackle, like the type used on furniture. The PVA-acrylic technique doesn't do this - it results in lines, like warped paint on wet wood, and it's an entirely different look. It depends what effect you're looking for, but if you're not fussy, I'd recommend PVA-acrylic every time.

Thanks again for looking. I'll be back on Thursday with a layout or two to share!

Sunday, 29 August 2010

I Ain't Gonna Stop the Rain by Complainin'

Now that August is nearly over it's time to celebrate what an awesomely hot, sunny and bright month it was.

Huh?

That's what I'd like to be writing, but unfortunately, the opposite is true: it's time to document, instead, what a disappointingly wet, cold and thoroughly autumnal August it's been this year.

Now, I know I won't stop the rain by complaining. So why not just be practical about it? Make a record of what it's been like and how I've dealt with it. Turn it into a celebration of sorts. Exercise my creativity and make sure that inner summertime is still there somewhere.

I went with a mini-book, inspired by some paper I picked up recently (MME Quite Contrary Jack & Jill: Be Happy 'Gleeful Paper' and My Favourite Thing 'Colourful Umbrellas Paper').

I cut this shape from the two MME papers and also some white and brown cardstock, and some acetate. I used Sassafras Lass cloud stamps and Toga chipboard letters on the front page:

I printed a photo we took at the Belgian Day of Independence in July and inserted it at the beginning. It's the only photo I used - I think it did all the work required from photos, speaking volumes about the weather, about Brussels, about how to deal with the rain. It features a group of drama students arranging themselves into a representation of a thought that was once in Belgian painter René Magritte's head.

I wanted lots of layers, and lots of variety with as few different papers as possible. The MME papers are double-sided, so that meant I had four patterns and two base colours to play with.
Thickers helped raise the relief of the pages:

I incorporated lots of clouds (obviously!) and raindrops (I'm so glad I saved these teardrop gems!). The wellies I cut from foam and drew onto with a thick black pen:

For the acetate page I traced over the umbrellas and coloured them in, using a CD pen (it doesn't come off the acetate):

For one page I stamped around the edges and then painted over most of the page with a layer of acrylic paint (I've seen it around a few times so I wanted to try it myself):

On some leftover acetate I freehanded some swirls and dots with the CD pen, and added a little bit of accent white acrylic paint here and there before cutting around it and sticking it over a page of stamped clouds:
Finally, I couldn't resist including the words of one of my favourite poems, Thomas Hardy's 'A Thunderstorm in Town':
I am proud to say that I have achieved exactly what I wanted from this mini - catharsis, for sure, but it also really makes me smile now when I look at it. A few things I'm really happy with are the layering of the lettering:

Using Glossy Accents over a cut-out umbrella to make a strong, shiny coordinating embie:

And the free-hand acetate swirl:

I hope looking at these bright pictures can put a smile on your face too, even if it's bright and sunny where you are. Thanks for looking, and I'll be back on Tuesday with a little tip I recently came across, and the results of my giveaway.

Thursday, 26 August 2010

A Needle, a Donkey and Me

I'd like to start by saying thank you to those of you who commented on my sewing post - the feedback was really useful in planning future projects. Although I would really love to work more on making a bag - ah, who am I kidding... I mean lots of bags, and purses, yes, purses - I sadly don't have enough fabric at the moment to go down that road. I'd like to get some really interesting fabric - like this and this (in fact, if you have deep pockets, a penchant for looking at fabrics, and a few hours to spare, you have to check out the whole of this site!) - but I really prefer to visit fabric shops and actually feel before I buy. I've yet to find the good ones here in Brussels, but to be truthful I haven't looked far beyond Ikea.

Despite the lack of bag fabric, I did pick up the needle again, albeit a giant child's needle because it came with the kit (yes, a child's kit), and made myself a little guard for my craft space. He's almost as cute as our doggie.

I call him Rasta Donkey. There was even more mane and tail in the kit, but he was starting to look silly. I think they were trying to compensate for the insufficient amount of stuffing - he's a bit too... relaxed.
Thanks for looking, and don't forget about my little giveaway in the post below. If you'd like to be in with a chance of winning the free stuff, leave me a comment as per the instructions at the end of the post. I'm off now to try to get Rasta Donkey on his feet.

Monday, 23 August 2010

Do You *Heart* Giveaways?

Hey everyone. So... (drum roll please) ...this is my 100th post! As promised, I'm going to celebrate by running a little giveaway here. But first, let me show you something.

Now, I'm NOT really a huge fan of hearts. NOR am I so very keen on certain shades of pink. But there are exceptions to everything, and I am open to having my mind changed. Months ago I bought some little balsa wood hearts because they were that shape of heart that is a little elongated... basically, not your classic, symmetric, round heart shape. I had only a very vague idea of what I wanted to do with them - I wanted them to hang. But they sat there in my To Do Box - sad, bare, lonely little hearts, wondering why they'd been relegated to a dark cupboard.

Last week I started playing around with colour combos and found that I could quite comfortably tolerate light shades of pink, if they were tempered by off-white and sage(ish) green. Then I remembered my wooden hearts, and my own heart leapt. Perfect. Two days later I had a pretty wall hanging:

To make these, I painted the hearts with white acrylic paint, and then inked around the edges in a sandy colour (Memento Desert Sand). Then I stamped a line of flowers (with an Artemio stamp) in Memento Rhubarb Stalk across the middle of the top and bottom hearts, and stuck some gorgeous gingham ribbon underneath (the ribbon is from All My Memories). After that I cut some teeny scalloped circles with the Cricut (in dark grey), some teenier circles (in dotted green and gingham pink), and some even teenier hearts (again in dark grey). Along with some pink ric rac, I stuck them all together, rounding off with a tiny gem:

For the middle heart I cut some larger scalloped circles (in pink), a large dotted green heart, and some circles in gingham pink and cream writing paper, stuck them all together, and stamped on the central circle (these stamps are from the DoCrafts Papermania Chatsworth collection):

The hearts came with holes in the top, but to get them to hang in a vertical row I had to ask my fiance very nicely if he would drill some extra holes for me. Surprise - I didn't even have to write it on his To Do List. It was done that very afternoon, and I fixed them all together with a very thin pale pink ribbon. From top to bottom this wall hanging measures just under 30cm. I so love the finished article! It is simple, yet very pretty, and certainly a lot prettier than my usual preferences. It also has a certain air of 'age' about it... not wear and tear, and not vintage, but somewhere in between. I'd like to hang it above the bed, that is, if we lived in a nice old country cottage. But in our apartment I'll have to think of somewhere else, since our bedroom is very red. And black. And oriental. Hmmm...

Now, onto the giveaway! Because I bought 6 hearts, and there are only 3 in this wall hanging, I made 2 of them. That means I have 1 to give away, so I hope you like it!

What you'll need to do to be in with a chance to win this lovely line of hearts is leave a comment for me below. But not just any old comment. I'd love it if you could:
  • Tell me what creation of mine is your favourite from August and July;
  • Describe something that inspired you in August or July to do something you don't normally do; and
  • If you have a blog or website, stick the image at the top of this post in your sidebar or some other place and link back to this post.
I'll draw randomly at midnight on Monday 3o August. Really looking forward to your comments!

Thursday, 19 August 2010

Stamping on Flowers

I just wanted to share a little thing with you - something I was really pleasantly surprised with when I saw the results.

My mum gave me a stamp that she didn't want anymore, a big square of paisley pattern, and I was struggling to think of how to use it. I was going to make a card and had some big plain flowers that needed sprucing up... cue the paisley stamp, and whaddaya know? I took the flowers, put them on some spare card, and stamped the image right over them.


I think they look so good! The flower is in the bottom right of the card, looking much more interesting than it did before stamping. I used the whole square of the paisley stamp too on the background of the card:


(Sorry about the bad pics by the way... have had computer issues these past two weeks and thing still aren't back to normal.)

Thursday, 12 August 2010

Those Diamond Memories

That scalloped 12x12 paper used in my last post reminded me of some layouts I haven't shared yet. They're from 2008, when we visited Croatia and Montenegro, and this time I wasn't the one behind the camera. My fantastic husband-to-be took all these incredible photos (helped out by the breathtaking scenery in that part of the world) - many, many more than I've scrapped. I wanted to keep the pages simple and bare, so that no attention was drawn away from the photos. Turned out they are very bare...


This was the day we drove to a beach that we could only access by making our way through the grounds of an enormous abandoned hotel, and pretty much climbing down some cliffs. It was too far to get to Dubrovnik old town the way we'd come, so we paid a local to take us via the harbour in his very shiny, white leather-seated speedboat. Talk about arrive in style. This is one of those diamond memories - things you're so pleased you've done, that would've always been a regret if you hadn't done them. A lot of these photos are things we saw on the walk around the city wall... and when I see them, I desperately want to go back there!

Summertime Blues

As it is pouring with rain here, and has done at some point every day this month, I am trying to find some inner summertime. I still have lots of Echo Park Sweet Summertime paper left... that's the thing about 12x12 paper - when you cut it up and use it for bits and pieces it seems to go much further. And there's this photo that I took a few years ago when we visited a Beach Near Us. I've wanted to scrap it for a long time, but have been so obsessed by the fact that I should've
done a much better job at the photographing stage that I have never planned anything for it.

Until now. Desperation for the sun has set in, and I look to paper for a bright, sunny day. This is my creation - very simple, using lots of Sweet Summertime paper and LOTS of the stickers that come with the set. I flicked paint over a cloud-shaped mask in the top right, and used Sassafras stamps above the lettering.


And I feel - momentarily - much sunnier. The photo I'm talking about is the one of the beach huts - they're beautiful, but my camera skills then were minimal, and I'm still disappointed by it. I hope the page instead does them justice!
Also, don't forget about my giveaway, coming soon!

Wednesday, 11 August 2010

Exploding Box (better late than never) and ***Other News***

A few months ago I constructed the base for a mini-album of sorts - the exploding pyramid box. Well, I've finally finished it. After deciding finally on the contents, I had to run a technological assault course of buying new printer ink, cleaning the printer nozzles, backing up my files, reinstalling Windows, updating all my links and drivers, and building up the computer again to get it to the point where I could actually print the photos I wanted, in the way I wanted. I'm the other side of that now, and despite my brain hurting a little and my patience being tested a lot, am back into the swing of the papercrafing thing.

Here is the exploding pyramid box. I've left the outside blank, except for a short title (yep, that's the person it's for):
And I've kept the embellishments on the inside quite simple, sticking to flowers and buttons:


As I said in the earlier post about this, the two papers I used were Sassafras Lass Life is Beautiful Woodland Whimsy Paper Garden (outside layer) and Scenic Route Garden Grove Brookhurst Street (inside layer). I'm now off to post this to my Nan in time for her birthday.

Other News

Well, first of all, I'm going to be published again in SNR Magazine. Second submission, second acceptance - not bad. If I keep this up I'll have a permanent free subscription :-) This time they've chosen to publish my layouts 'Me' and 'Slide Away' (the yellow and blue page).

Second, I'll be posting my 100th post in five posts' time, and to celebrate that I'll be giving something away - so keep an eye out for news of this in the coming couple of weeks!

Monday, 9 August 2010

Embellishments!!!

Emerging from my sewing frenzy last week I felt out of sorts with the world of paper. I have a few projects I need to work on this week but I couldn't seem to get into the right frame of mind to start any of them last night - you know how it can be sometimes, when it's hard to find that creative place...

So I decided to break myself back in gently. I grabbed a handful of random stuff and just started glueing. In the end, and in about 3 hours (if that's slow, I was also watching a film), I made 24 embellishments!


Things I used were circles of card, punched and bought flowers, patterned paper, buttons brads, gems, epoxy stickers, bottle caps, chipboard, paper clips, crackle paints and - check these out, they're my favourite, especially with the crackle paint - wooden pegs. A close up:


Watch out for more embellishments on the way. I'll warn you, they're addictive!

Thursday, 5 August 2010

I've Been Sew Busy!

This week I put aside paper crafting to get through a long overdue list of sewing tasks. The reason I'd been putting it off for so long was because I'm not hugely confident with the sewing machine... but, well, practice makes perfect. And though I'm far from perfect, I have improved greatly, and am now thinking about more complicated projects. Here's what I worked on this week.

First, very first, I finished the curtains for the bedroom (I started these back in February - yep, that's how long I've been delaying) by adding the tabs:

I had some leftovers from this fabric, which I was about to add to my leftovers bag when I found some other really good contrasting leftovers... and so I decided to make some little birds:


The pattern for these can be found here. They're so cute! But don't look too closely at mine - they're my first attempt! That was Monday. Tuesday I made some cushions:

- which got all creased up by the dog on the sofa before I could photograph them. I also fixed loads of clothes - it feels like I've got a new wardrobe!

Wednesday I made some more curtains, this time for the spare room, out of a great colourful CHEAP fabric from Ikea. Basically the door has glass panes in the top half, as does the adjoining door to our bedroom, so we wanted to cover them to provide a little privacy for our guests. It's also a very dark room, being at the back of the house (and in the basement, oh yes), so the colours really brighten it up.

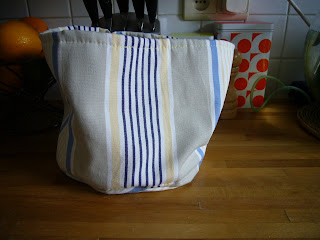
Thursday I made a bread basket. Slacking off, that's all I made.
Friday, the final day in the week of sewing, I made a bag from this pattern - with the leftover material from the spare room curtains and some other leftover fabric I had:

I'm back to paper crafting next week, but any suggestions for things to sew that you might have for me would be most welcome. There's a little scottie dog up my sleeve, for example...

Monday, 2 August 2010

Card Season

I've just completed a rather large project - putting together a collection of handmade cards for my mother-in-law's birthday (which she was very happy with!). The challenge was always to design a card that looks good but is very simple to make - I was making three or five of each design, and wanted to work quickly. Here are the final cards I added to the collection.