Showing posts with label skulls. Show all posts

Thursday, 19 January 2012

Boxes... and Skulls... Again

While I'm working on something very exciting and waiting on something else very exciting (I'll share this very soon), I've got a very tiny thing to show you today.
Like I did here, I've gone and made another skull box. 
lots of skulls....yeah!
(Sharing time: I have a possibly unhealthy obsession with boxes. Boxes, tins, and the like. I like to collect them. Even if they may not have any future potential use. I like to stack them inside each other. I like to find the precise right one to store things in. (Boy do I love to store things.) I like to decorate them as giftboxes. I like to incorporate them into scrapping projects. I like to make myself them and...etc)
I used a heat embossing technique and Inkadinkado stamps borrowed from my mum to get this super smart look:
love how oily and grungy it looks
Did I mention I like boxes? This one was used to house a gift voucher at Christmas - and now it holds cufflinks. The gift voucher wasn't for cufflinks, but cunning box reuse is evidently one of my husband's traits too.

Wednesday, 5 October 2011

The Wedding of Awesomeness: Part 1 of Many

Hello everyone, and welcome to my little story about the time I got married. It was not, I can assure you, though I'm sure you already know, a day of pink frilliness and enormously long dress trains. It was more a day of Things That Make Up Us.


The groom and the bride got ready on the morning of the wedding in separate houses: I with my bridesmaids and my mum, and he with his groomsmen and his family. A few days earlier I'd taken a little box of presents over to the house where he was getting ready, for the boys to open on the day. The little box contained the boutonnieres that the boys would be wearing. Of course, they are handmade. As was the box.

Gauche Alchemy goodies helped decorate the lid
The texture of the box was achieved by mixing some texturising medium with acrylic paint, loading it up onto the lid and sides of the box, and then pressing a woodgrain pattern embossing folder into the paint. You gotta try it - it's a great effect!

See? They're just jumping to get out

I hand-sewed the felt skulls myself. Regrettably, I can't take credit for the idea, though. Here is the main man's skull in action:


Lots more to come soon! (And possibly some official photos, one of these days)

Tuesday, 2 November 2010

Making an Impression

As promised 
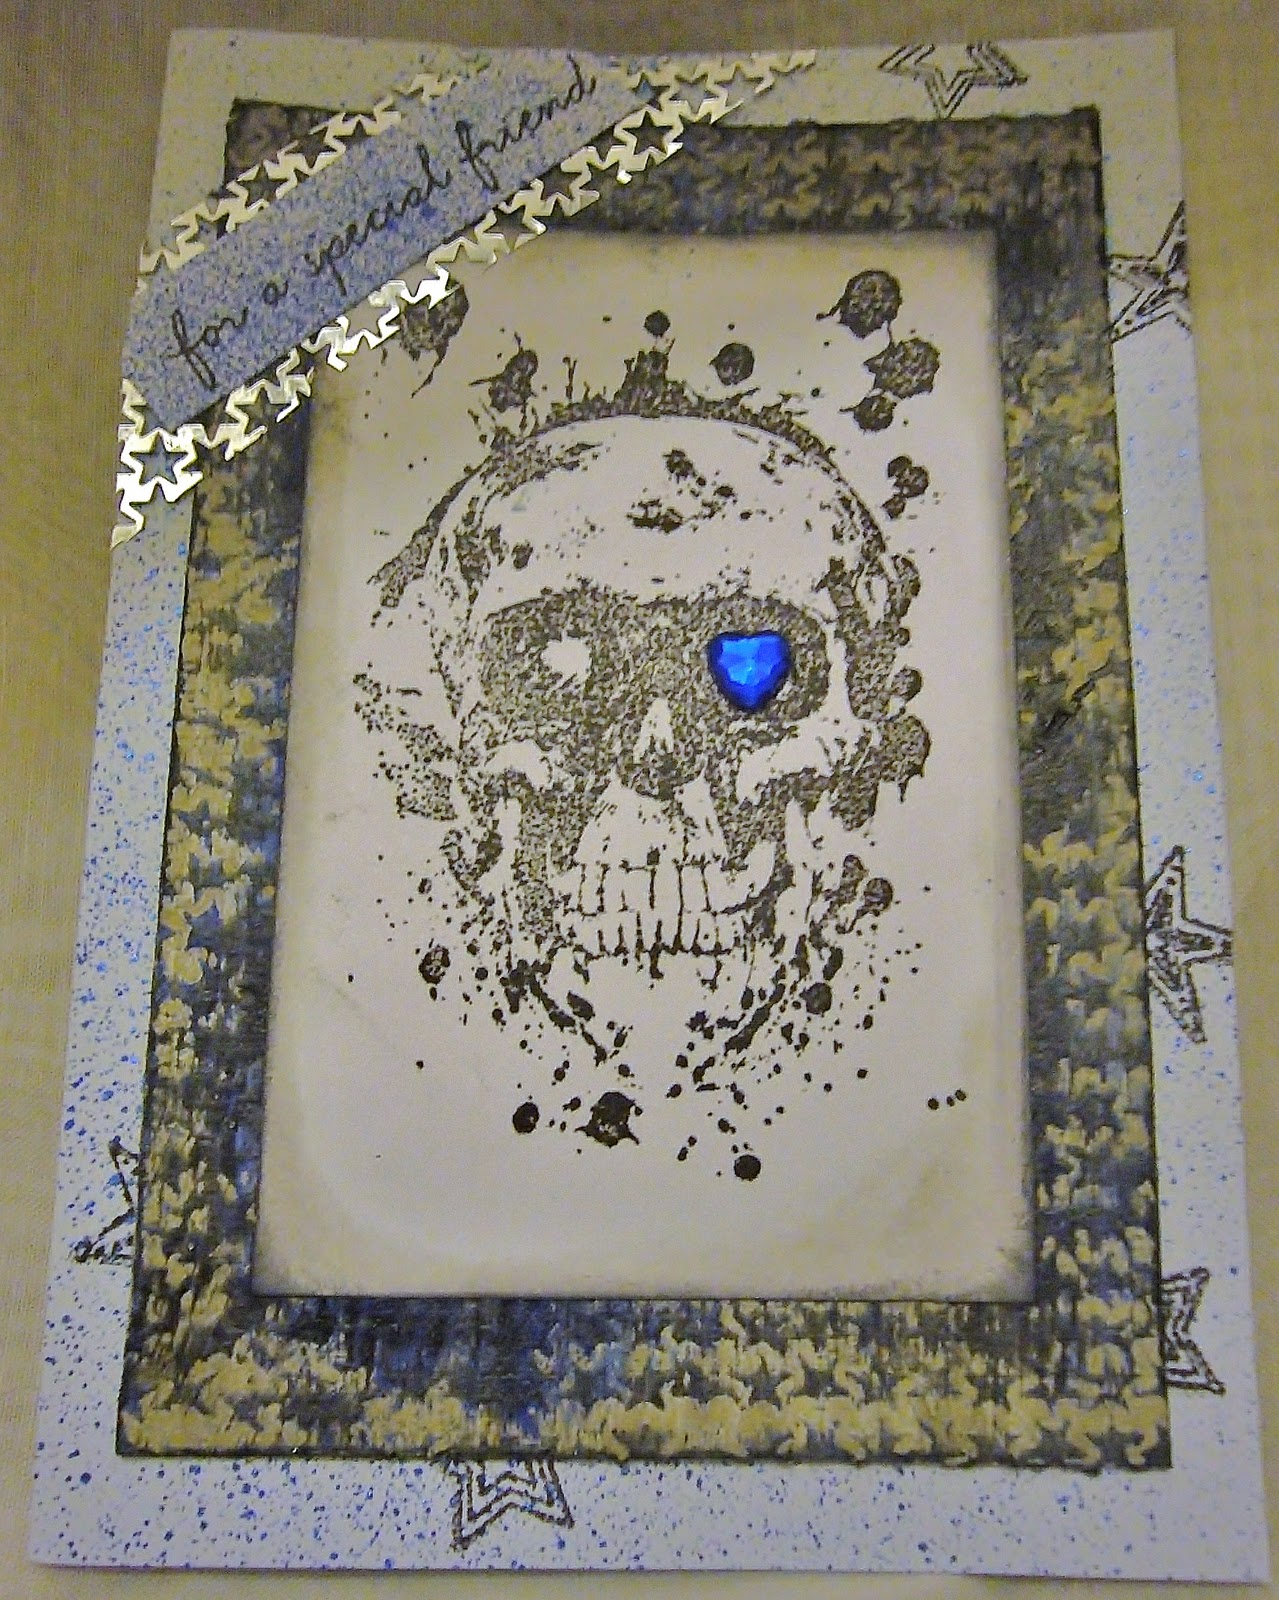
on Sunday, today I'll show you the noisy technique for making impressions of shapes on cardboard - which I used in the skull card.


I saw it in a magazine, a French one called Histoires de Pages. They used fancy Melody Ross tools and chipboard, of which I had none, so I improvised.

First of all, take your cardboard shape (I used the cardboard that backs a pad of paper), and lightly wet it by going over it with a wet brush or sponge, or mist it with a spray bottle. Then take your tools - you'll need a hammer, a board on which to hammer, and something to make an impression with. Melody Ross has some steel stamps which give a deep deboss, but as I had nothing like this that was suitable for the skull card I went with an emboss by using what I think is a backing sheet for sequins (that is, it's thick foil and has tiny shapes punched out of it, and I'm assuming these shapes became sequins).

Start hammering. This was the noisy part: I really went to town to get a deep impression. My table is inlaid with tiles which began to ring slightly with the impact, and a combination of no carpets and very high ceilings topped it off by echoing and amplifying the sound. Sorry, neighbours! This is what it looked like as it started to dry:

The next step is to paint LIGHTLY and haphazardly over the cardboard with gesso. You can see how I used the area that wasn't going to be on show (the middle section) to unload my brush to the desired point before going over the shapes. The key is to really only highlight the embossed parts and not cover the debossed parts too much. If my example had been made with Melody Ross's tools or anything else to get the deboss effect, I'd be aiming to keep the stars relatively free of paint. But as I was embossing, I was trying to keep the negative space empty.

Then mix a paint or ink colour, and when the gesso is dry, paint over the cardboard in the same way as before. It doesn't matter if the white still shows through - that's the look we're going for.


After this layer has dried, mix 50/50 a dark paint or ink with some kind of varnish. In the magazine they used Mod Podge, but I don't have any of that fancy stuff, so I used PVA glue. Cover the whole piece of cardboard with this paint/varnish mix and allow to dry thoroughly.


When it's dry, you may need to sit it under some heavy books for a while to flatten it again. Leave it overnight, and it'll be ready to use the next day.

This technique was really fast, and looks really good. If you make something with it, let me know - I'd love to see what you come up with. Thanks for looking!

Sunday, 31 October 2010

Halloween 2010: A Brief Encounter

Shocking. I LOVE Halloween. And how much time have I had to craftily spend on it? Not much. Not much at all. Certainly not enough.

I'm so grateful, then, that one of my friends, whose surprise birthday party it was last night, is a punky-metally kinda girl. I used my new skull stamp to make her a card, and a bit of halloweeny inspiration to make her a photo frame. And then I liked the frame so much that I made one for us too. And put the skull in it. So OK, maybe I had a teeny bit of time to make one small Halloween decoration. Ahhhh - that's better.


For the card, I added a small blue heart gem to one of the eyes. I love that. Looks a bit piratey, a bit evil, and a bit lovely too. I also used a very noisy embossing technique - which I'll show you on Tuesday.

I did the same for the skull I put in the frame. 
For the frame, I sprayed some Cosmic Shimmer Mist over some star masks and then stamped a couple of images on in grey ink. And I stamped a couple of other images in glue and covered them with flock.


And of course, I made cookies. I couldn't resist. They went into the spidery bowl for the trick or treaters who have just left - and left me with nothing but crumbs.
And finally, I found a first use for the birdcage...


 I hope everyone had a very happy halloween!