Showing posts with label craft. Show all posts

Wednesday, 16 November 2011

My Creative Process

I've had a few questions lately about my creative process, so I wanted to talk a little about that today. I've been asked whether I plan everything on a page or just go with the flow. I'll focus on layouts today.

Usually these days I start off with a sketch - Scrapbook Challenges and Punky Scraps DT duties provide me with most of them, but I also like to look at Creative Scrappers and others that come up along the way.

Punky Scraps Challenge 34 sketch
my take


Then I spend a good few days thinking about the theme of the layout - I'm finding I like to tell a story on a page, but not necessarily with words. My journalling is usually on the back of the page these days, or hidden in an envelope or pocket somewhere on the page. So I think about the story, and which embellishments I have that can help me tell that story. Gauche Alchemy kits are great for finding the right bits and pieces.

I'll usually re-draw the sketch myself, adding notes about layers, embellishments, techniques and so on.

Next - and I find this Absolutely Important - I select the Most Appropriate background paper (I'm making 12x12 and A4 layouts at the moment). This is the true beginning. I have often made the wrong selection. I rarely go back and redo a page if I've already finished it. But if I haven't yet begun, or have only just begun, I will go back and select the right paper.

From this, the colours and textures will start to flow. Keeping the sketch in mind, I think about the page layer by layer - do I want the rub-on under the paint? Should I mist and mask the base paper? Can I stamp over that series of paper strips? Can I stamp over that stamp already there?

And then I get started. I roughly follow the sketch, but don't get panicked if things start to go off course. It's an organic process, and a page may turn out looking very different to a sketch in the end. I make mistakes, and accept them. I commit.

I've made a few 'test' pages, practising techniques and so on, but I've never been happy with them. I seem to be happier experimenting as I go. And it's this experimenting that is helping me develop my skills and broaden my repertoire.

Take, for example, the punchinella that comes from Gauche Alchemy. There has to be more to it than just layering it underneath something, right? Play with it! Test it! Push it to its limits! There are LOADS of things you can do. See for yourself:


And a bonus this month:


the card I made with the punchinella resist technique

Experimenting is so important for the creative process. You can decide what you like doing, what you don't like doing, what you're better at, what you want to investigate more.

Go experiment!


Friday, 4 November 2011

No Regrets

Often it's too easy to dwell on the past, to go over things that didn't quite happen the way you expected and analyse them for how they could've been changed or avoided... I'm guilty, sometimes, of this - like most people. But I do make it a daily challenge of mine not to live this way. This year one of my resolutions was to stop worrying about the passage of time and see how much it slows down (it works, by the way), and an aspect of this change was adopting the 'No Regrets' mantra.

this project is subtitled 'my tidy catharsis'


This was put to the test almost precisely two months ago today. Awake at 7.30am on my wedding day, and with 6 hours ahead of me in which to get ready, I was blissfully unaware of the stress that would bring the morning to a close. The car (you've already heard that story, about which I have no regrets, by the way) was due to take us away at 1pm. So, in a leisurely, calm mood, I had my nails painted, and had some coffee, breakfast, and then some champagne. Then it was My Turn - I sat in The Chair and began to have my hair and makeup done. From there, I was facing a clock dead on. I watched with anticipation as both hands approached the 12, then with discomfort as the minute hand hit the 6, and then with rising panic as it passed the 12 again, and passed the hour hand pointing at the 1.

Five minutes later my makeup girl finally gave me a Murray Walker-esque 'Go GO GO!' and I ran downstairs, literally jumped into my dress, had my bridesmaids zip me up, and ran back upstairs to grab my bouquet and my shoes. Outside there was just time for a quick photo and then - uopa! - into the car we squashed, and sped off into the busy centre of Brussels.

It would be two hours later before I realised that I'd completely forgotten to put on my veil - the first accessory I focused on in my wedding planning to embody the image I wanted - and a further 5 hours after that that I realised I'd completely forgotten to write up my vows for our personal ceremony - leaving me with a scribbled piece of paper of half-remembered things and huge gaps where I had wanted to put the love in.

Today, these two issues are still smarting. But in the grand scheme of things, neither caused the world to end, neither ruined the wedding, and neither were unfixable after the event. We will have a 'Rock the Dress' photo session next year, and I will wear the veil. I have written up my vows in full and in the way I wanted to read them, and will give them to him soon. I'm moving on, with no regrets.

...none whatsoever.
For more similarly themed projects, get yourselves over to the Punky Scraps blog this week for the first challenge of November. You'll love what the team have done, and you'll probably love the challenge, too. Thanks for reading my stress story. Now it's out there it feels much, much further away and an entirely tinier problem. See? No regrets!


Thursday, 14 July 2011

Flowers coming out of my ears

quite.

Wedding flowers, beautiful wedding flowers. Beautiful handmade wedding flowers. I've just made the bouquets for the bridesmaids, and I can't wait any longer (I can't wait at all, it seems) to share them with you.

I was so unsure for so long how I wanted the bouquets to turn out... I had one idea, then another, then went back to the first, then had a third, a fourth, and so on. Then we changed our minds about the bridesmaids' dresses, and that totally threw all bouquet plans up in the air.

But a late April visit to bluebell-carpeted woods convinced me that uniformity would be most visually impressive. And so I got to work. The result is a simple, understated and elegant little bouquet which should hold up pretty nicely against the bridesmaids' dresses.


Now just to solve the problem of my own bouquet...

Tuesday, 28 June 2011

Heartstrings and Other Things

After the mammoth delivery of quality custom handmade wedding decor from my mum, the pressure is off me somewhat as I realise there's not too much for me to do.

The legendary bunting


I have had some decorations knocking about for a while, and now seems as good a time as any to share them.

I had to have hearts on a string:


I also had to have a sprinkling of tiny spheres:


There's more to do, but I'm not so stressed about it all.

*gulp*

Thursday, 23 June 2011

Wedding Flowers

This week I've been busy on the beginnings of bouquets for my bridesmaids.

Here's a little peek of something I've made so far:


And here's a peek of some of the flowers my mum has made:


I'm still trying to pin down all my ideas for my own bouquet. They're all still flying around in my head. If you have a tip, an idea, or a link to a bouquet that made you go 'ooooh', please let me know!

Thursday, 9 June 2011

Saving the Date: Waterfall Card Tutorial

As soon as I asked my husband-to-be if he'd prefer lollipop or filmstrip STDs, he immediately pricked up his ears. The plan was always that I was going to be making all the stationery and decorations myself,* but suddenly my man was offering assistance. It wasn't until we started making the STDs that I fully realised how grateful I was - and how good he is at doing stuff with paper ("It's just lady-tools, isn't it?").

* Later it turned out my mum would make a very large portion of the decorations too.


Anyway, we opted for a filmstrip-style design. But we wanted something a little different, a lot fun, and somewhat interactive. Here's what we came up with:


It's a postcard, a photo booth strip, and a waterfall, all in one. We received such awe-filled praise from our guests-to-be that, apart from feeling very pleased with ourselves, we want to share what we've done. So here's a little step-by-step on how to make a waterfall save the date postcard.

A few words of advice before you begin: decide on - and print - the final photos you want to use BEFORE cutting any card. It'll save you loads of time, stress and wastage. Even though you'll probably take some amazing photos that you love, you might have to let go of them and accept that they don't work. For this project the photos were portrait and roughly passport-sized (4.3cm x 5.6cm to be exact). All relevant measurements I give will relate to this size.

For the mechanics of the card:

1. Cut your card to size, and print your message on the back. (If you've chosen an image to print on the front, like we did, print this too now.) Our cards were postcard size - A6/C6.


2. Cut a strip of card that is as long as the postcard is wide and wide enough to be sturdy (2). Ours were 2.4cm wide by 10.5cm long.


3. Cut another strip that is as long as an A4 piece of paper, portrait-wise, and as wide as your photos (3). Ours were 4.3cm wide by 29.7cm long.

4. Measure where you want your small strip (4a) - about a fifth of the way up from the bottom of the card is good. Measure where the large strip needs to be folded - one end needs to join to the small strip (4b). And you don't want it to extend past the top of the postcard, so you'll need to make a fold there (4c).

Then fold and score the large strip like this:


so that the intervals between folds are half the height of your photos, except for the first one (the part where your large strip will join onto your small strip).

5. Fix the small strip across the postcard - with glue, double-sided tape, eyelets, brads, whatever you want. Just make sure you only fix it at the edges because the large strip needs to move underneath the small strip (5).

6. Fix the large strip to the small strip with glue or double-sided tape (4b again).

7. If you want to, back your photos with patterned paper:


- do this before sticking the photos down.

8. Then stick them down, the last photo in the sequence first (on top of the part that joins the small strip), by applying the glue or double-sided tape to the large strip and then putting the photo in place (it's much easier this way round, trust me!).

9. To make sure your recipients know what to do when they receive the card, give them a little instruction (9). Alternatively, you can punch a hole and add a ribbon if you prefer, or anything else you can think of.

Et voila!

It took us about 10 hours altogether to make 50 of these. That DOESN'T include the time we spent agonizing over the photos, which I don't really want to talk about! The chosen pics in the end were a compromise but we're essentially happy with them... except that we are a little gutted that this one had to be vetoed (yes, my fault, because I didn't like my expression):


Still, we had fun! I hope you like them!

Tuesday, 10 May 2011

My 199th Post

After all the planning and the looking forward to this moment, it's crept up on me in a fortnight of insane amounts of work distractions and will have to pass unceremoniously and without the planned giveaway. Well, watch this space on the giveaway.

At 199th post point, I obviously wanted to reflect a little. So, almost 6 months into the year, I'm going to glance back at my 2011 resolutions and assess the state of things.

1) The Get Healthy resolution - after some ups and downs, I think I can say 'Check'. Or at least, I've finally got it in check.
2) The Stop Worrying So Much About The Passing Of Time resolution - for me, really quite successful until a meltdown of sorts last weekend. Back up and running now though. And definitely happier for it. Which was the intention.
3) The Continue To Sand Down My Rough Edges resolution - slower going, this one, but I'm pretty sure I can say I've made some progress. Little and often, little and often.
4) The Co-Organise Our Wedding resolution - well, yes, this one is working. Not without spats, but definitely working. It has to, really, otherwise we won't have a wedding.
5) The Increase The Amount Of Freelance Work I'm Doing resolution - I meant by actively seeking out work, and in those terms I have failed so far. But on the other hand I've been getting pllllllllllllenty of work for 3 of the 4 elapsed months so far so it's not so bad.
6) The Craft In A More Focused Way resolution - I certainly have planned ahead, revelled in keeping lists, toned down the spending to small but Important purchases. And I've produced layouts in much faster times than ever before. Success here.
7) The Write More Narrative On My Blog resolution - so far, mainly a fail. I would blame the speed of the passing of time, but for the fact that Resolution #2 would jump off the screen and slap me in the face. But I do want to Write More Narrative. And Better Narrative. Because I do miss writing.
8) The Make Cards From Paper and Materials I No Longer Like And Will Never Use In Other Crafting resolution - not a complete success, but more a success than a fail. In fact, not making many cards at all this year helps skew the figures in my favour somewhat. Hmmm...must make more cards.
9) The Sit Down On Every 25th Of The Month And Make At Least 10 Christmassy Things resolution - ummmm, I was unable to foresee, in January when my eyes were bright with the possibilities a whole new year might bring my way, how utterly un-Christmassy I would feel on any day of  the month, let alone the 25th. So, after January - a fail. But not one I'm ashamed of. I've discovered I like Christmas to remain what - and where - it is. After December 5th - and that is all.
10) The Make A Postcard A Week resolution - I have kept this up, although I've been in such a rush lately that I've sent the postcards off before photographing them. So technically I can't prove it. But if you have any doubts, send me a postcard. Etiquette says I must reply.

There - my half-way status. I'm fairly happy with it. Not really into self-flagellation right now as stress leads to unproductiveness and I cannot be unproductive at this time.

2011 so far has brought me a whole bunch of new online friends - thanks you lot for being so cool - and numerous exciting possibilities that I can't wait to get my teeth into. Here's to the future - from post 199.

Oh, and here is the mother's day card I made for mum-in-law-to-be. Gotta get used to having two separate dates for this one.


Thursday, 21 April 2011

Tried and Tested

You may remember a kraft-and-colour layout I made about my brother not so long ago. Well, his birthday is coming up and I thought, why not go with this tried and tested formula for his card too?


And I liked it so much I made another one for someone else:


It wasn't until I finished them that I realised I'd broken my resolution to only make cards from scraps. I'm not going to beat myself up about it though. I am up to date with my Postcard a Week challenge, at least, although I sent the most recent ones without taking photos, so you'll just have to trust me.

Tuesday, 19 April 2011

A Little Bit Punk, A Little Bit Rock n Roll

After a full night of wedding nightmares, it somehow seems apt that I finally share pictures of our invitations.


(These are not the original photos I took; they disappeared with the life of my laptop. So the lovely black, kraft-lined envelopes and the two great piles of invitations live on only in my head.)

And as the reality of the nightmares fade, if not the memory, I have some great news to share too: I'm on the Punky Scraps DT for 2011-2012! Yep, I'm now officially a Punky Rebel. Punky Scraps is a great challenge blog with a DT that is a bit more unconventional... go check it out!

I must now go and brush the residual cobwebs away and do some positive wedding planning to avoid any of the outcomes in my dreams. Have a nice day everyone!

Tuesday, 12 April 2011

Short and Sweet

The distractions of the birth of a wedding and the death of a laptop leave me short on time today, so I'll just say that the postal system is once again graced with my custom - I'm almost caught up with the Postcard a Week challenge!

Here is what March brought: no great shakes, but I do seem to using the postcards to experiment with styles and techniques. Which doesn't always lead to success, but hey ho, on we go!


Thursday, 7 April 2011

When I Was...

Not only is the April scraplift challenge about to go up over at the True XOXO Girls blog, the blog has also had a facelift and will soon be featuring posts from us Lipstick Chicks throughout the month to further inspire you.

My page for scraplifting this month is made - finally - from a kit supplied by the lovely Sandra at GottaCraft. The photo is from a couple of years ago, when I was interviewed by the BBC for an event I'd organised. My mum, of course, scrapped the photo straight away, but I kept it, not knowing how to. Then 'For the Record' came out, and suddeny it all made sense. I put the two together, and this is what I got:


I've included lots of close-ups, because I love this collection so much, and to show you how it has inspired me...


The gorgeous reds, yellows and greens are offset so strikingly by the black and white. I paired this with bakers' twine, painted flowers, a doily and a transparency.


I can't get enough of this collection. It's  a good thing, then, that there's still quite a lot of it left in my scraproom!

If you play along at True XOXO Girls, you are in with a chance of winning a yummy kit, as always, so get on over and get lifting! 

Tuesday, 5 April 2011

A Lady and Her Dress

I discovered something at the weekend - I can draw a bit. I was sketching and I thought to myself, wouldn't it be nice to be able to draw like a fashion designer? So I sketched some more, and then got all brave and took out a black Copic pen and committed. I drew strong lines over my pencil sketches and did not look back.

This is not what my wedding dress looks like by the way.

Then the trusty Copic markers came out - they're really quite good - and a bit of paper shaping, and voila - a lady and her dress.

A teeny smudge or a snub nose? You decide...

It's a postcard, which means I haven't given up on my Postcard a Week challenge. But it's a departure from mail art for sure, into the realms of I-know-not-what-I-can-do. It's inspired by the fact that a couple of weeks ago I collected my wedding dress from England, and it now sits in my wardrobe to be peeked at (only by me though) every other day. Which is all Rather Exciting. Especially as I also have all but one item of the rest of my outfit, meaning that I am going to be trying it all on about once a week from now until September.

I'm not brave enough to draw feet yet. But it was important to get the crinoline in there! 

I'll be working on catching up with the postcards this week - after this, who knows what I'll come up with?

Sunday, 3 April 2011

Simply Mum

In the UK today it's a special day for mums. Not being one to share my feelings easily, especially in public, I'm going to be short on words and big on colour to (hopefully) show how much I appreciate my mum.

I made her card from scraps. It sounds horribly un-special, but in fact...


... I think it's quite special. I made the little flags from sandwich picks and cocktail sticks, and the pin is actually from my mum so she gets it back today.

Happy Mother's Day!

Thursday, 17 March 2011

A Blank Canvas

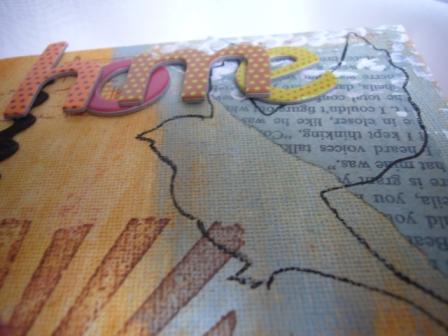
On Monday I said I would share a few more things from the market, so here I am, with my first real foray into mixed media canvases.

Up until last week I had three small (A6-ish) canvases sitting in a drawer, since forever probably, and although I knew they were waiting patiently for the right time to be unfurled to the world in their proper state, I was a little impatient with myself for not being ready for this magical time to occur.

Last week the time came. I laid out inks, sponges, brushes, paints, stamps, glue and a few other miscellanies and got messy. Here's what I came up with:


... and now I've released them to the world, where they can fulfil their destiny.

While I've got your attention, I'd like to announce quickly that following a short delay, March's scraplift challenge is up and running at the True XOXO Girls blog - pop on over if you feel the need for some layout inspiration. If you do end up lifting any of the gorgeous pages there, including mine (let's just take another look at it)...


....then you'll be in with a chance of winning a luscious prize from Candy Shoppe Designs. I know their kits, and I can tell you they are DELICIOUS.