Showing posts with label hearts. Show all posts

Monday, 5 March 2012

The Handmade Wedding

You've all seen by now all the handmade things the wedding brought along - now it's time to scrap about it all!

The sketch this week at Scrapbook Challenges made me so happy about sketches and scrapbooking. It was one of those moments when you've been waiting to scrap a certain idea or certain photos for a long time, and one day the answer just pops up.

The sketch looks like this:


And after I put my page together it looked like this:

Scrapbook Challenges sketch #285
What I used for this page: Doodlebug Love Potion patterned paper, Echo Park Style Essentials Upscale Black Quatrefoil and Grey Dots & Stripes patterned paper, Echo Park Happy Days patterned papers & alpha stickers, Rayher wooden hearts and bobbins, Toga chipboard alphas.

Quite to my surprise, I'm building up our wedding album pretty quickly. And it's looking pretty sweet.

Get over to Scrapbook Challenges for this sketch, and all of the March Madness going on this month. As ever, you could win something for your participation!

Saturday, 8 October 2011

The Wedding of Awesomeness: Part 2

It feels really weird to write this, but there were more than two hearts at our wedding.

What you saw when you looked up

Those hanging paper hearts are, and have been, all over the internet and especially Etsy for some time. But I still had to have them. I made them back in February, and I was damned if I wasn't going to use them! Cherry paper and everything!

The magical bunting was a labour of starchy love. My mum made over 50 metres of it, having chosen a whole range of fabrics that would match with the outfits and colours and styles of the wedding. I don't have the precise data, but I think it took a good couple of days to starch all of those triangles.

And the nautical stars - well... I made those a couple of weeks before the wedding, deciding one day that there was not enough nautical star in the whole picture. After the little star on the invitations, there had to be more!

These little ones were fiddly to put together

The hanging stars are 3D. I can tell you how I made them, if you like. It's quite easy.

1. I printed a large star template, and added tabs onto each outer line in pen. Then I used the template to cut out two stars from a piece of card, complete with tabs. I drew all the inner lines on in pencil with a ruler, including the ones separating the tabs from the main body of the star, and then scored along all the lines.

2. I manipulated each star so that the long lines coming from the centre to the points were mountain folds, and the shorter ones coming from the centre to the dips were valley folds. I folded all the tabs inwards.

3. This is where you decorate the star as you wish. I used the folds and lines to measure and cut out contrasting half-points to give it that nautical look.

4. Then I used PVA glue to stick the tabs of each star to each other. This was quite slow, as I needed to pinch and hold each part so that it adhered fully and began to dry before I could move onto the next part.

5. Once dry, the star - if you've made it, like I did, from thick card - is very sturdy, and holds up to more manipulation. Squash it down a bit, to make the folds and valleys really pop and dip.

6. Finally, hammer an eyelet through the top point and string it up.

They're equally good for Christmas... and that's just around the corner!

I'll leave you with a picture of me and my family.

Stylish, no?

Tuesday, 16 August 2011

Counting Down

I might have mentioned here that there would soon be a plethora of grey-plus-a-colour pages on my blog. Scrapbook Challenges' sketches are helping me create layouts right now, which is good because there's no time to think up sketches of my own. Here is this week's:


I'm counting down to the big day, and it's already a lot closer than when I made this layout.


Look! I used pink AND hearts! I'm really pushing my boundaries!


That dotty, puffy heart above is from a Gauche Alchemy Color Kit - you'll see lots more products in the coming months!

Sunday, 24 July 2011

One Love

Yesterday I had a hair and make up test run for the wedding. I felt pretty special. A tiny part of me felt a bit silly, going to such showy lengths, but mostly I am just so excited now - it's drawing closer, everything seems to be under control, and we are gonna have such a great party!

I know I'll have a thousand photos to scrap after the wedding, but that doesn't mean I'm holding off on wedding layouts until then.

There was a sketch released earlier this month on the Creative Scrappers site - number 164 - that spoke directly to me. It looks like this:


I needed to scrap it. But I needed a good reason to scrap it. It had to be special.


Then the challenge over at Punky Scraps this week was given to us on the DT, and I knew exactly what to do. If you want to join in, you need to use the following ingredients list to create a layout:
  • Photos of items, not people
  • 3 circles
  • Turquoise
  • Stitching
  • Red
  • 2 or more staples
That first one on the list is what sparked off this whole page.


I'd been working on my photography and took a photo of our rings that I was just so happy with, I had to scrap it. I know people shouldn't really be seeing them yet, but I couldn't resist. In trying to keep things fairly simple I didn't used as many layers as I'd have liked, but I did get to use the beloved Heidi Swapp Ghost Alphas again:


Love that red stitching! Thank you, Creative Scrappers, for such a great sketch; and thank you, Punky Scraps, for a great ingredients list.

Tuesday, 21 June 2011

Happily Ever After: Wedding Card Special

While I was happy to have gone to my first wedding EVER as a guest a couple of weeks ago* some of my friends are boasting about having five, six, seven or even eight weddings to go to this year.

*It's true! Always the bridesmaid, never just a guest. What can I do about that? You might think it's handy to never have had to choose my own outfit, but I was itching to:


Anyway... one of my friends asked me to make her a batch of congratulations cards for all the lovers out there. I duly obliged, having weddings on the brain and all. She told me a little bit about each couple and I tried to interpret that and turn it into a card. I found this immensely fun. Some of my creations:


Mostly keeping it quite simple, aren't I? I can't let myself go with cards like I do these days with a scrapbook page. I'm itching to make another layout, but have to focus this week on making flowers. Sneak peek coming soon!

Tuesday, 14 June 2011

At Last

As you may remember, I had (like most other people out there) some computer issues a couple of months ago. Namely, my computer showed a dislike of wine and shut down with a flicker and a huff, and wouldn't wake up again.

Apparently, though, it is possible to dry them out. After purchasing a shiny new laptop, I eventually braved the on button of the old one... and whaddaya know? It works. Just like it did before.

So, at last, I can share the original photos of our wedding invitations.

cute, no?

This is but one of the piles of them:


And here is what they look like on the inside:


You simply slide off the outer band, and you have three cards - the invitation proper, some info and an RSVP:


We used Bazzill swiss dotted white cardstock for the sleeve and some paper from MME for the cards (Lost & Found Union Square "Happy" paper). I did a little bit of letterpressing for the "&" circle, some fussy cutting to get the printed swallows, and employed some good old Cricut action for the hearts and stars. Oh, and a circle punch for the sleeve.


Now, although I didn't think I was doing any jumping, there really is a bandwagon. And not in a bad way. Over at Paper Issues there is a linkup opportunity for wedding projects. Yes, I've already played linky a few times this month, and there will be more linkups before the month is over!
Monday, 14 March 2011

After the Market

Yesterday I was at market. While many of you I'm sure were having a nice, relaxing Sunday, maybe at home or maybe strolling around a craft fair yourselves, I was behind a stall. Operating (or trying to) in French. And today I'm exhausted :-)

I just wanted to show you a few things I made for sale.


...Some altered wooden hanging hearts...


...a clipboard (I confess, I copied the one my mum made for me below)


...some embellishments...

...some gift tags (actually these are leftovers from a batch I made ages ago)...


...and some tags that my mum made for me to sell...

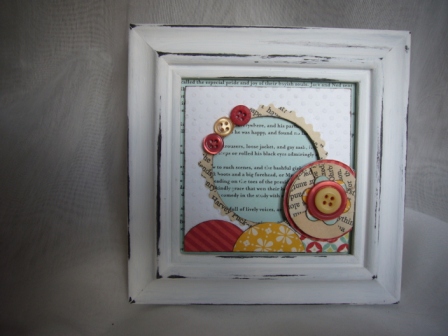
...as well as a couple of altered frames...


There were some other things I made too, but I'll share these another day - have to catch up on some sleep now!

Tuesday, 22 February 2011

Postcards and Previews

The heart month still isn't over, as my postcard this week proves:


I tried my hand at an arty printed postcard this time - taking a photo opportunity from the piles of wedding invitation prep. We have this neat little portable postcard printer, that in theory should be taken with us whenever we go away but rarely is... anyway, it came out beautifully. It's better for photos than our regular printer.

I've also been working on testers for wedding venue decoration. Here are a few peeks:


I am so in love with music score paper flowers right now! And check out that last pic - a tissue paper lollipop!

Thursday, 17 February 2011

Love and Project Restyle

This really is turning into a month of love for me. I've still got heart projects to share!

First up, a teeny-tiny mini book. This book came together with items from opposite ends of the scrapbooking spectrum: its cover is cream cracker packaging salvaged from the recycling bin, and inside are beautiful Melody Ross sentiment cards which always happen to say the right thing at the right time.


The other project I finished last week was February's Project Restyle submission. I took this ill-fitting and unflattering shirt:


and turned it into some of the cards you saw on Sunday, as well as some stuffed hanging hearts that you caught a glimpse of on Tuesday:

There's still a lot of fabric left over, so... hmmm... what next?